How to Make AI Animated GIFs (Stickers & Memes): AI Frames → Batch Cleanup → Assemble
The frame-by-frame method: ask an AI to draw 4–6 frames of the same character in different poses, batch-clean every frame (cutout, watermark, uniform size) with free browser tools, then combine them into an animated GIF. No video model required.
Two ways to make an animated image
There are two ways to make an animated image. The first: use a text-to-video model (Runway, Kling, Hailuo, or similar) to generate a short clip, then convert it to a GIF. The second — the frame-by-frame method — is to have an image AI draw 4–6 still frames of the same character in different poses, then assemble them into a looping GIF. The frame method gives you control over every single frame: you can cut out the subject, remove a watermark, and fix a bad frame before it ever becomes part of the animation.
- Video-model route: prompt → short clip → convert to GIF (feels like magic, but every frame is hard to fix)
- Frame-by-frame route: AI draws N still frames → you clean each one → assemble into a GIF
- Frame method wins for stickers, memes and simple loops where you want each frame to look right
Why the frame-by-frame method fits memes and stickers
A meme or sticker is essentially a 2-to-6-frame loop: blink, wave, nod, walk-cycle. Video models are overkill — they animate the background too, the character style drifts between frames, and you cannot fix one bad frame. With the frame method you can cut every frame to a transparent background (making a real sticker), scrub a watermark off one frame, and keep the character identical in all of them by reusing the same character description in each prompt.
Step 1 — plan the frames before you generate
Decide three things before you open any AI tool. Frame count: 4–6 is the sweet spot for stickers and memes (fewer looks choppy, more gets heavy as a GIF). Frame size: pick one size for all frames, for example 512×512 or 1080×1080 — mismatched sizes break the assembly step. And the action loop: list the poses you want in order, e.g. eyes closed → eyes open → look left → look right → back. Writing the loop on paper first makes everything downstream smoother.
Step 2 — generate each frame with a consistent character
Keep the character identical by keeping the character part of the prompt fixed and changing only the action. Write the character description once, then for each frame reuse it verbatim and append the new pose. The five-part structure from our prompt guide applies here too: 主体 + 细节 + 动作 + 环境 + 风格. Generate the frames one at a time so you can check each one.
- Fix the character: same species/age/hair/outfit words in every frame prompt
- Change only the action slot: "eyes closed" → "eyes open" → "looking left" → "looking right"
- Generate one frame at a time and check it before moving on
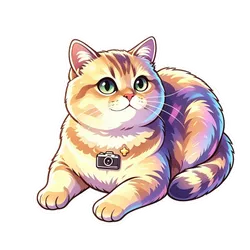
- Example loop for a cat sticker: "a ginger British Shorthair, round face, big eyes, plain background, sticker style, blinking eyes"
Step 3 — batch-clean all frames in SuperPixMia
This is where the platform earns its keep: every cleanup tool runs in the browser and handles a whole batch at once, so you import all frames in one go and download everything as one ZIP. Cut out the character from every frame with the Remove Background tool (batch mode) to get transparent PNGs — your GIF becomes a sticker. If any frame has a watermark or stray text, paint over it with the Remove Watermark tool, also in batch. Then make sure all frames are the same size with Resize (batch), and shrink file size with Compress (batch) before assembling.
- Import every frame at once — each tool handles the whole batch and exports one ZIP
- Cutout for stickers: Remove Background (batch) → transparent PNG frames
- Cleanup: Remove Watermark (batch) → paint over text/logo on any frame
- Uniform size: Resize (batch) so all frames match before assembly
- Smaller file: Compress (batch) keeps the final GIF light
Step 4 — assemble the frames into a GIF with the SuperPixMia GIF Maker
SuperPixMia now has its own GIF Maker at /gif-maker, so the whole pipeline stays in one place. Add your cleaned frames in order (the tool keeps your order — reorder at any time), set the loop to "infinite" (that is what makes a sticker loop), pick a frame rate around 8–12 fps, and click Generate. Transparent PNG frames keep their transparency, so a cut-out sticker assembles into a true transparent animated sticker.
- Assembly is in-platform now: SuperPixMia GIF Maker at /gif-maker
- Order the frames as planned — the tool keeps your order, reorder anytime
- Frame rate ~8–12 fps is the sweet spot for stickers and memes
- Transparent PNG frames → the GIF keeps transparency, a real sticker
- Cap the max edge at 512 or below to keep the GIF light
Bonus — putting the animation on a website (you may not even need a GIF)
If your animation is for a website, you often do not need to assemble a GIF at all. Our own mascot is a real example: the little cat on superpixmia.com is 5 static WebP images that the page swaps with JavaScript timers to create the blink and float effect — no GIF file anywhere. For 2–6 frames this is the lightest approach. You can do the same with plain CSS — a sprite sheet of frames flipped with the steps() timing function, or showing different <img> sources over time. GIF is still the best format for stickers you send in chat apps, but on a website, multiple still images give sharper edges, smaller bytes, and perfect transparency.
- Real example: the cat on superpixmia.com = 5 static WebP frames swapped by JS timers — no GIF file
- CSS sprite animation: one image + steps() to flip through frames
- Websites prefer still frames: sharper, lighter, perfect transparency
- GIF is still best for chat-app stickers; still frames win on the web
Optimizing and common pitfalls
Three things trip people up most. Size: too many frames or too-high resolution makes a GIF that is megabytes heavy — compress the frames first and keep the loop short. Consistency: if the character changes between frames it looks like a jump-cut, so reuse the exact character words in every prompt. Loop point: the last frame should flow back into the first — plan the loop before generating, not after. If one frame is slightly off, fix that single frame instead of regenerating the whole set.
- Keep it light: fewer frames + compressed frames = a usable GIF
- Reuse the exact character words in every frame prompt to avoid style jumps
- Plan the loop before generating so the last frame flows back into the first
- Fix a single bad frame, not the whole set
Frequently Asked Questions
How many frames do I need for a sticker GIF?
4–6 frames is the sweet spot. Two frames reads as a flash, eight-plus gets heavy as a GIF file. For blinking and waving, 4 frames is plenty.
The character looks different in every frame. How do I keep it consistent?
Copy the exact same character description into every frame prompt and change only the action part. If it still drifts, generate all frames in one session, or generate one master image and ask the AI to redraw it in different poses.
Can I make a sticker with a transparent background?
Yes. Run each frame through Remove Background (batch) to get transparent PNGs, then assemble the transparent frames into a GIF with an online GIF maker. The animation keeps the transparency.
Why is my GIF file so large, and how do I make it smaller?
GIF compresses poorly, so frame count and resolution dominate the size. Reduce the number of frames, resize the frames smaller (e.g. 512px), and compress each frame before assembling. Lowering the frame rate to 8 fps also helps.
Does SuperPixMia generate GIF files?
Yes — since the GIF Maker launched, SuperPixMia can assemble your cleaned frames into an animated GIF at /gif-maker. It still does not generate moving images from a prompt alone: you bring the AI frames, and the tool stitches, reorders, and tunes them into a looping GIF with transparency.
More from the blog
Why WeChat Images Look Blurry — 5 Causes & Exact Fixes
WeChat makes your photos look blurry? It is not your phone. Auto-compression, the 25MB limit, and the "send original" checkbox are the real causes. Here are the 5 reasons and the exact fix for each.
How Does AI See Images? Pixels, Tensors & Neural Networks Explained
When you see a cat, an AI model sees a grid of numbers. A beginner-friendly walkthrough of how images become tensors, why convolutions look at small windows, and how stacked layers turn edges into full objects.
AI Image Prompts That Actually Work — People & Animals (GPT, Gemini, Midjourney)
Why do some AI images look great and yours miss the mark? Mostly the prompt. Learn the simple five-part structure behind good prompts, copy-ready templates for people and animals, what differs between GPT, Gemini and Midjourney — then how to cut out the subject and clean up the result with free browser tools.